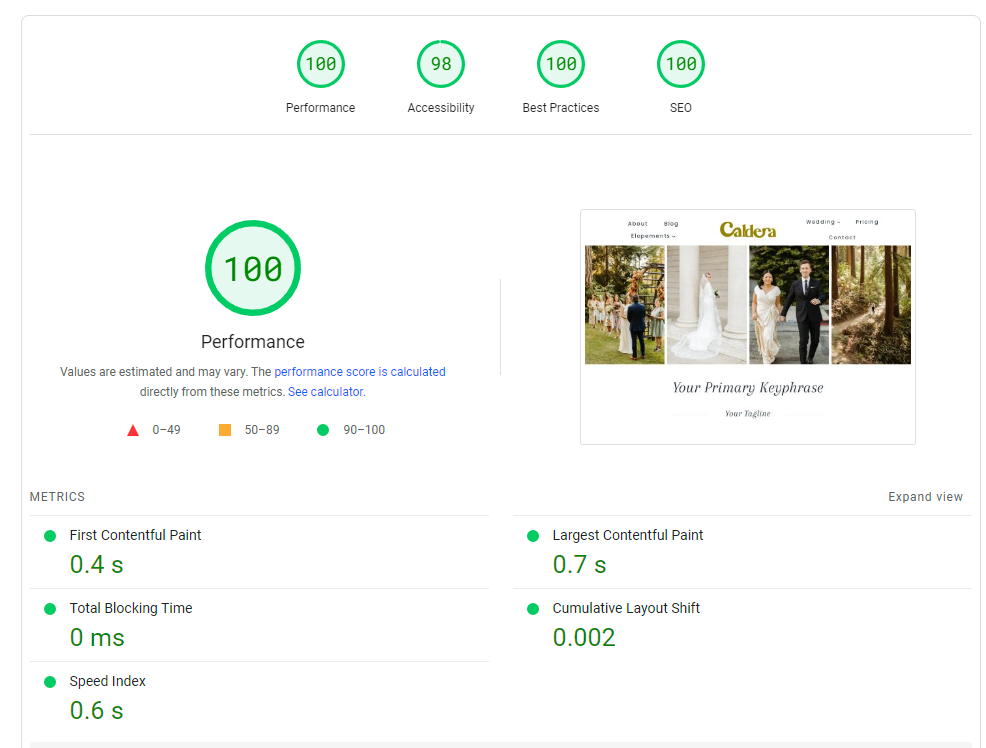
Improving Your Site’s Performance
The Sightsee themes perform pretty dang well out of the box, but we can make a few simple tweaks to push them to the bleeding edge of photography site loading times! Here are the steps we like to take on our sites.
I’ll include the exact settings we use for the demo site and then further recommendations if you want to chase shaving a few more milliseconds.
Quality Hosting
This is going to be quite key. You don’t want to be on cheap shared hosting (GoDaddy, Bluehost, Dreamhost, Hostinger, iPage, etc) if performance is something you’re prioritizing.
Our recommendation is Cloudways. You can spend a few extra dollars per month and get their Premium cloud server. Additionally, there are great caching tools available for their 2gb+ servers.
The 1gb premium servers are a nice compromise for most photography sites. Cloudways enables Varnish caching by default, this can both improve loading times and allow your server to handle significantly more traffic.
A note about CDNs
We typically do not recommend that photographers use a CDN add-on from their host. In most cases, the additional complexity and cost are not worth the performance benefits.
Cloudflare Free
We also do not recommend the free tier of Cloudflare for most photography sites, but you can test your exact setup with it enabled and see if it performs better (we typically find that it does not improve loading times or testing scores).
WordPress Performance Plugins That We Recommend
Here are the performance plugins that we use on our demo sites. We chose these because they are quick and easy to setup. We can also recommend them to a wide variety of websites and know that they should not cause issues.
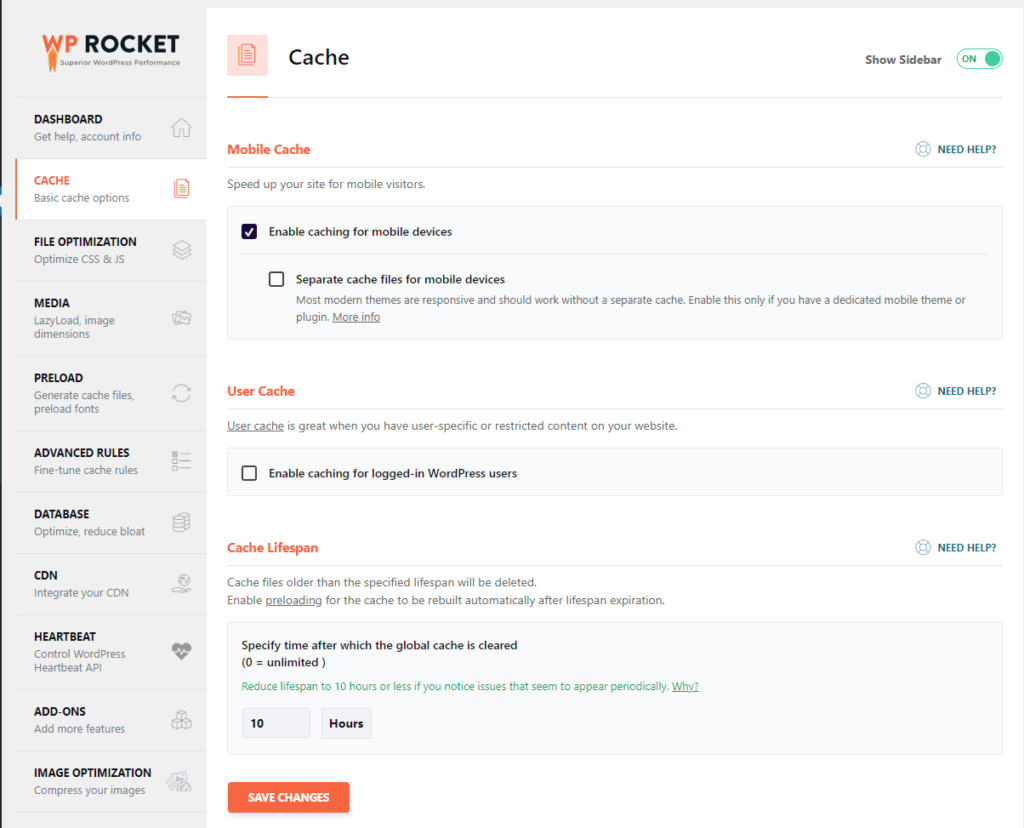
WP Rocket
WP Rocket is a premium performance plugin that costs $59 per year. This will handle a few main performance tasks:
Caching
Enable caching, enable mobile, the other settings can be left as-is.
File Optimization
Minify both CSS and JS files. Optimize CSS delivery with the Remove Unused CSS option.

You can test the JavaScript options for bot loading JS deferred and delaying JS execution. This can cause issues with your content not loading properly or not loading until a user begins scrolling. It can also cause issues or differences with analytics data.
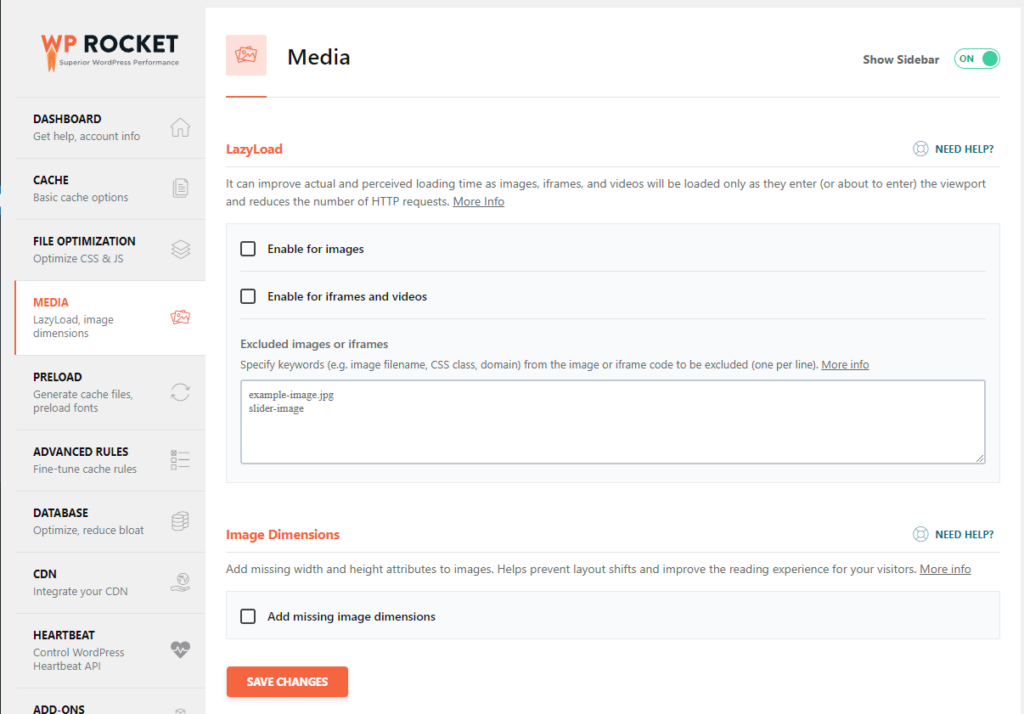
Media
We will be using another plugin, Perfmatters, for lazy-loading. If you don’t have that plugin, use this section to enable lazy-loading for images, iframes, and videos. It can also remove content layout shifts if you enable “add missing image dimensions”.
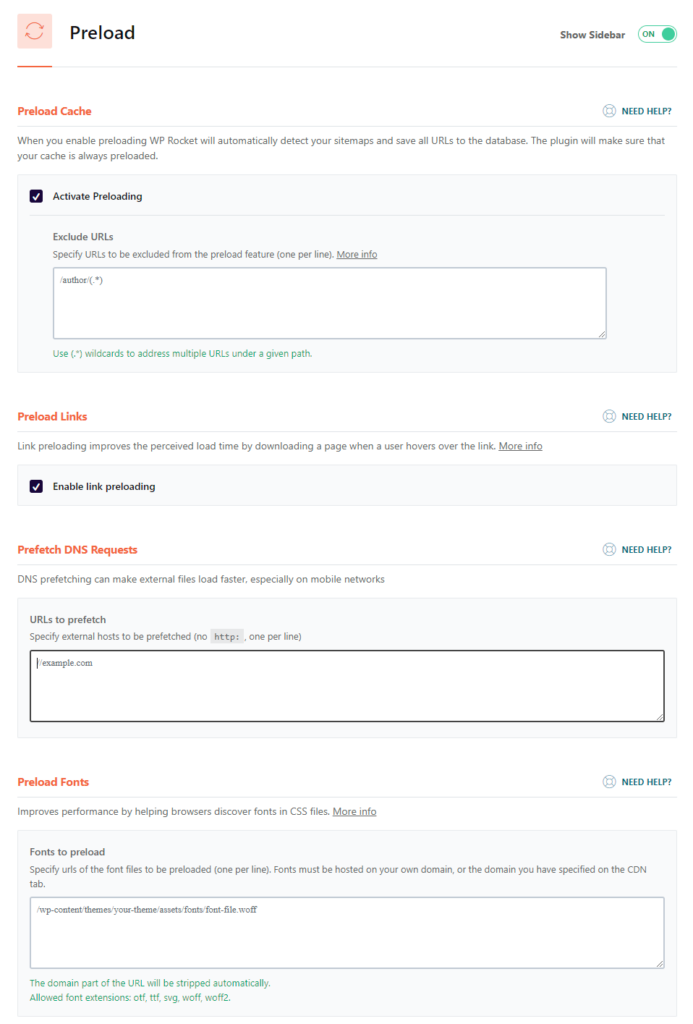
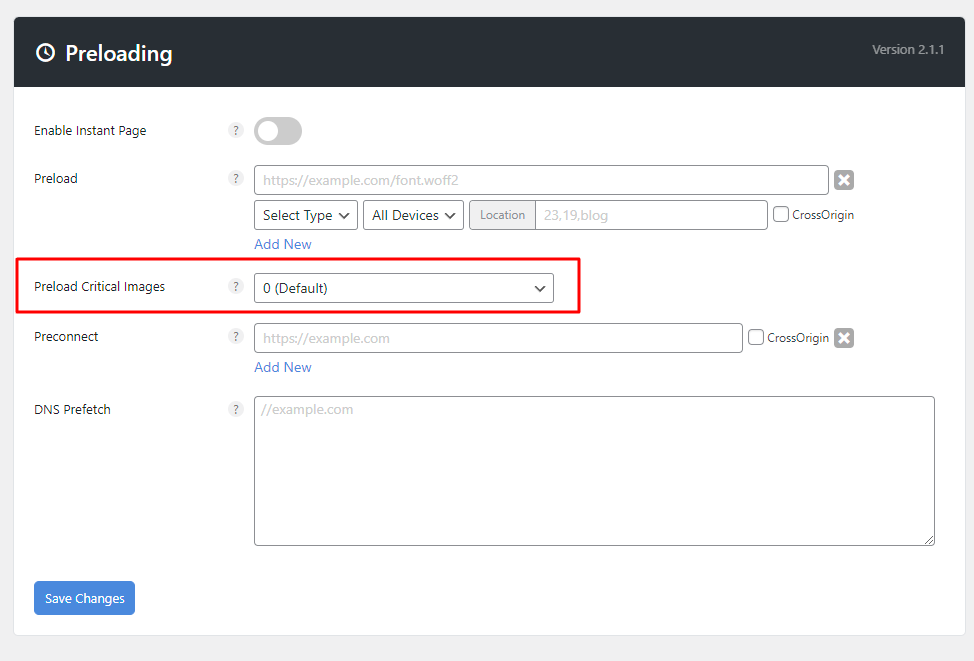
Preload
Activate preloading, this will make sure that all cached pages are preloaded instead of waiting for the page to be loaded and cached the first time. Preloading pages that change often can cause issues, but you can simply clear your cache after posting a new blog post.
Enable link preloading, this will make your site load quicker for users.
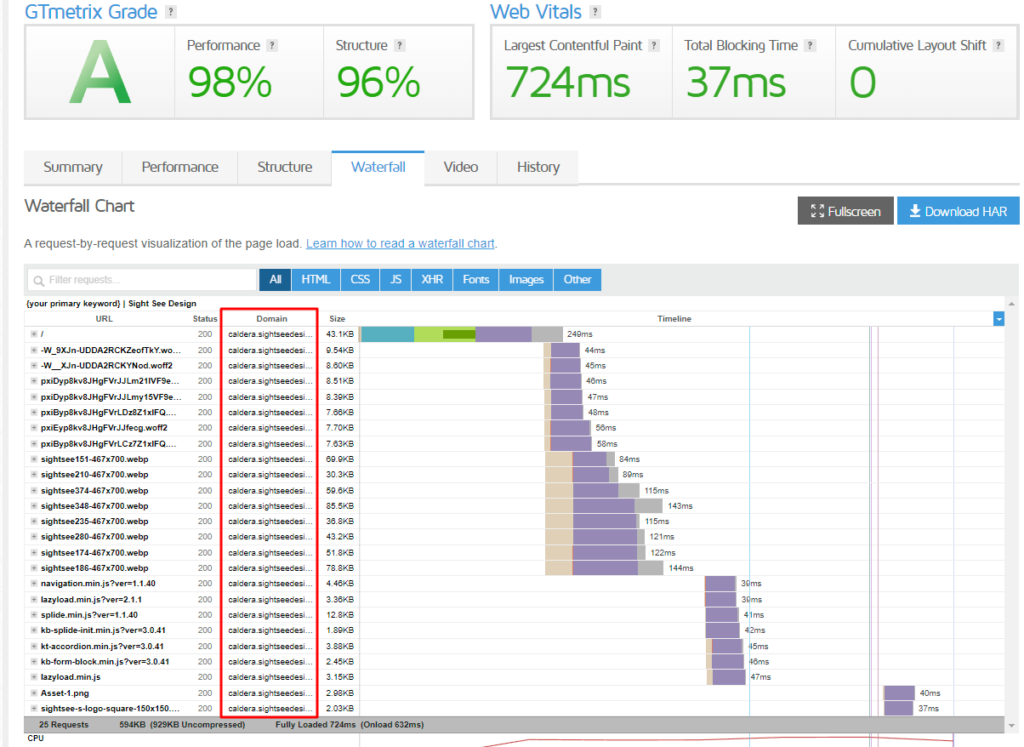
Prefetch DNS requests for any third party resources. My favorite way to find these URLs is by loading a site with a performance grading site like GTMetrix. Look at the waterfall tab and then check for any files loading from a site other than your own. Common hosts would be: google-analytics.com, fonts.googleapis.com, googletagmanager.com, etc.
Finally, if you have any custom font files, include them here. The fonts needed to load your initial content (page titles / first headings / initial text / navigation) have priority here. This will force the browser to begin loading the font files before they’ve even parsed your CSS to see if the font is needed.
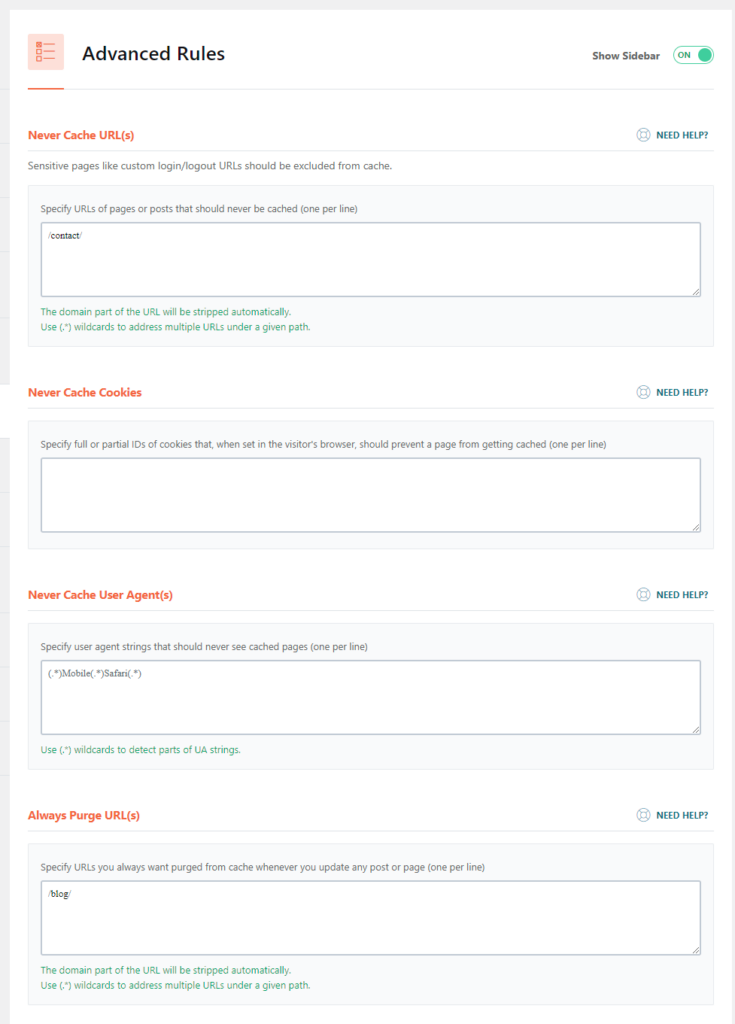
Advanced Rules
This section can make your site much more reliable. I like to “never cache” my contact page, this can ensure fewer reliability issues with my contact form. If you have e-commerce on your site, do the same for your cart and checkout pages.
I also like to “always purge URL(s)” my blog archive page. This will refresh its cache every time you publish a new post, automatically.
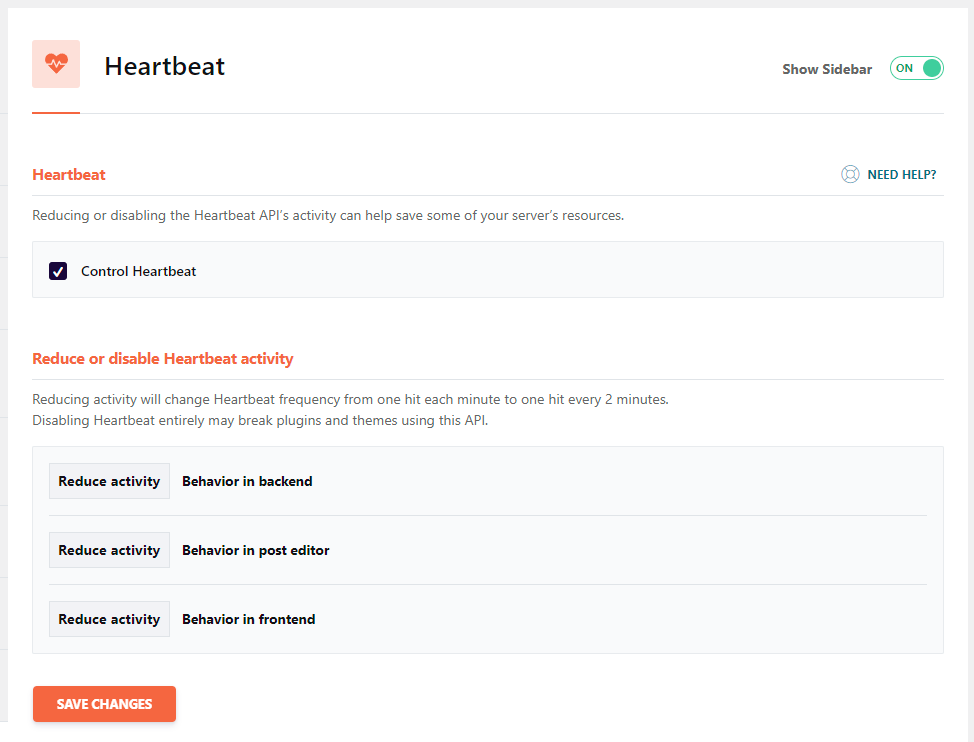
Heartbeat
I like to reduce activity in all three options.
Perfmatters
This is a great performance plugin as well, it is premium and costs $24.95 per year. In the past, it didn’t have as many features. I used to use it to work with WP Rocket primarily, but you could now likely use it to replace WP Rocket completely.
It has many advanced features that we won’t cover here, allowing you to choose which individual js scripts are loaded on every individual page on your site.
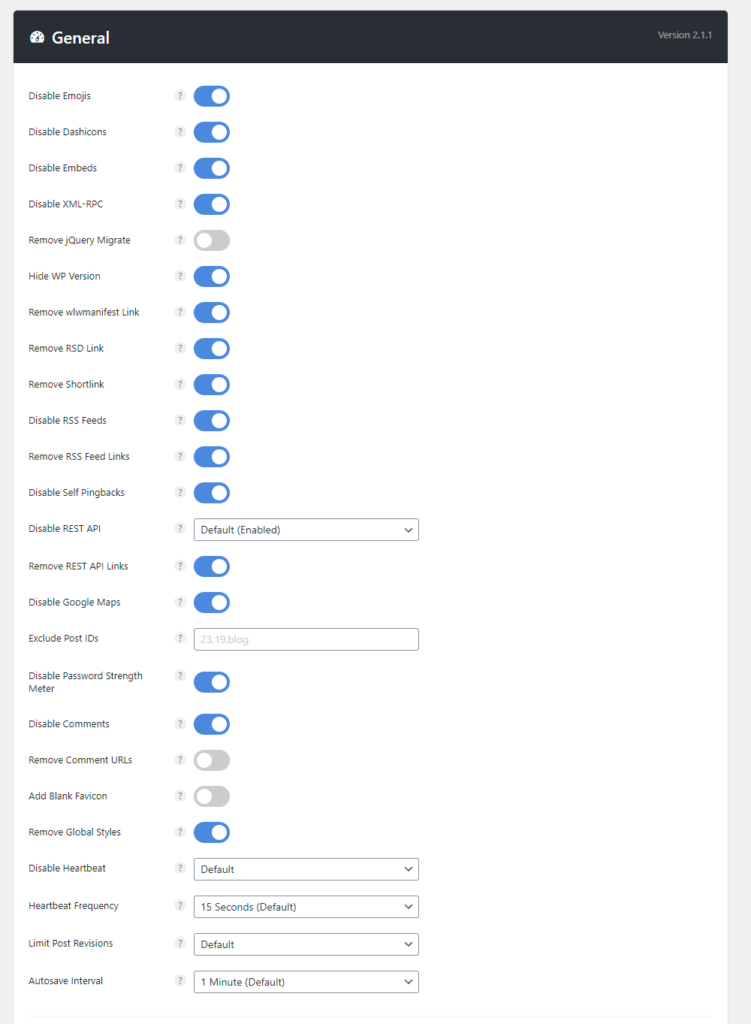
General
Enable all of these options, except for: Remove jQuery Migrate, Remove Comment URLs, and Add Black Favicon.
Preloading
We’ve handled this with WP Rocket, but the feature to Preload Critical Images is worth testing on your site. Most photography sites have a large image that takes up the majority of the initial viewport. Loading this image quickly is key to passing Core Web Vitals or Pagespeed Insights.
Try setting to 1-3, depending on your typical page/post layout.
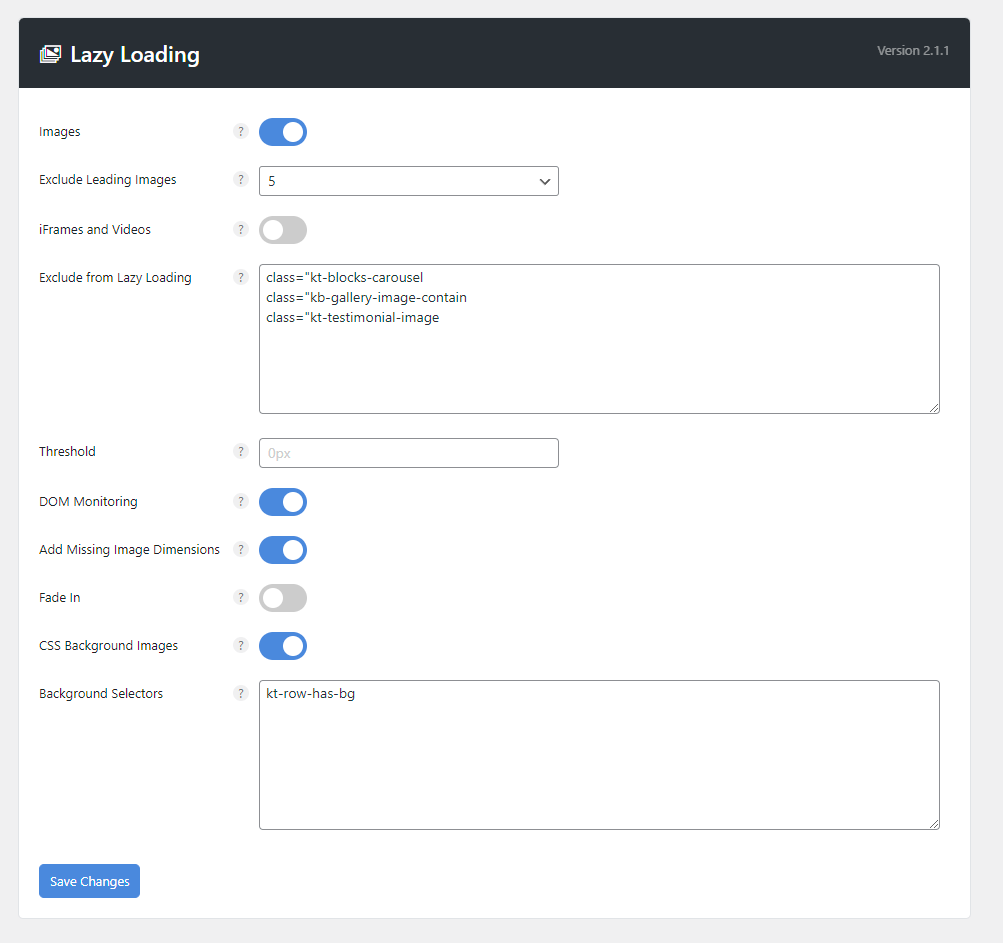
Lazy Loading
The lazy loading tool on Perfmatters has a few key features that are missing from WP Rocket. It allows us to exclude our carousel images. It also allows us to lazy load the background images used throughout many of our cloud sections. Use the following settings:
Fonts
You can disable Google Fonts.
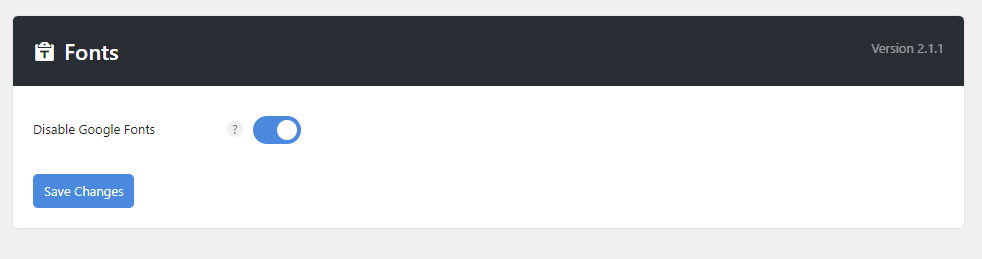
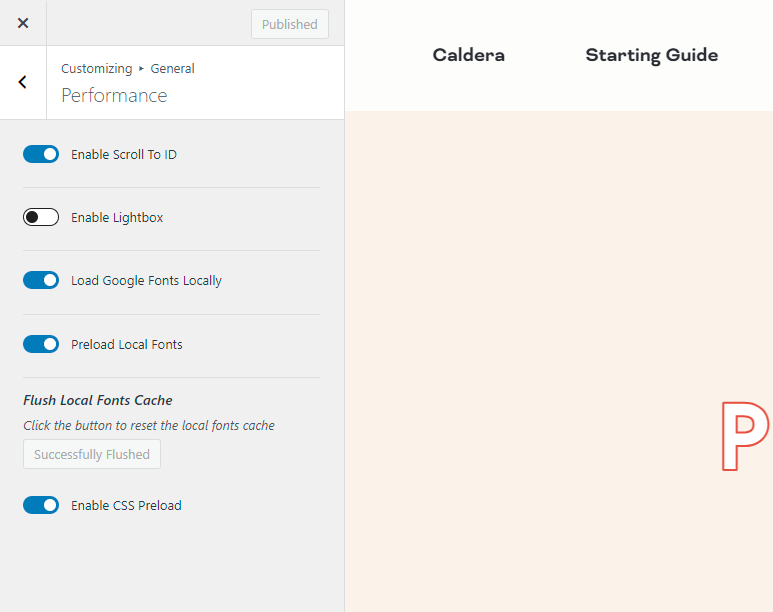
I recommend doing this, if you either use custom fonts, system fonts, or have the following settings in the Customizer (General -> Performance):
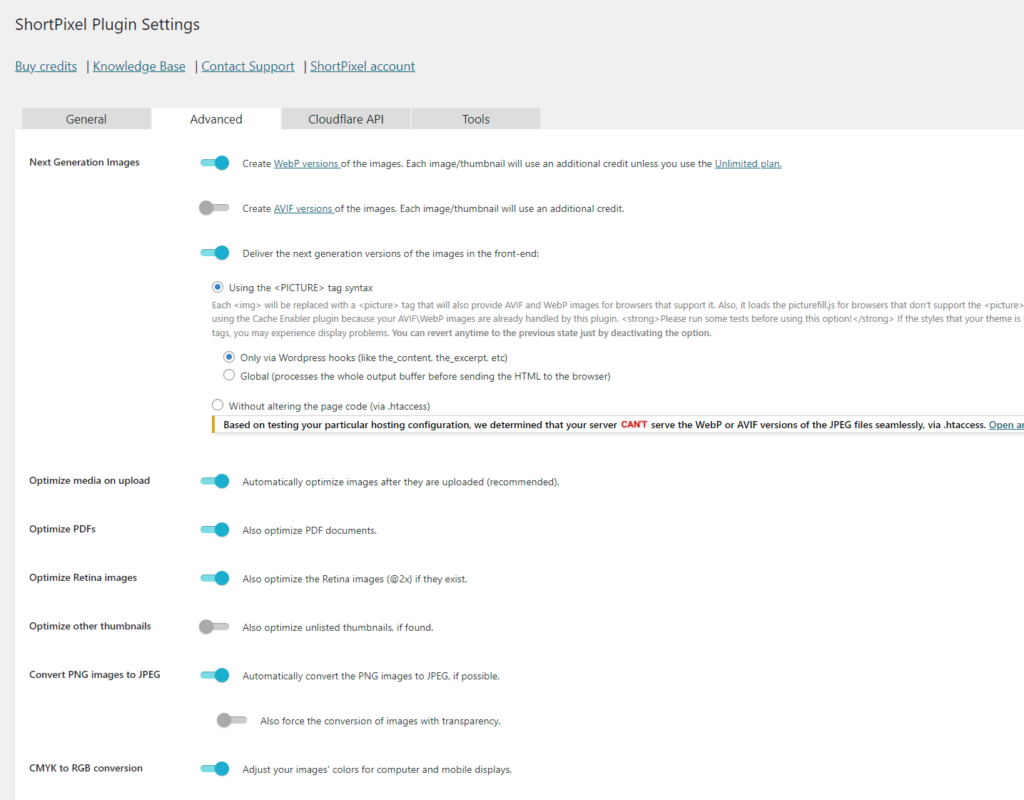
Shortpixel
This plugin can compress and optimize your existing media in bulk, and then optimize any new images you upload. They have a free testing tool on their website and you can purchase credits here.
General
I prefer the Glossy compression type. You can test your own images and decide what level of quality you’re happy with.
I also prefer to remove any exif data from my images. You can enable large image resizing. This is useful if you’re running out of disk space with your website host!
Advanced
Here, I create WebP versions of my images. This costs additional credits, so you can limit this to only your larger images for cost savings.
I also deliver these WebP images on the front-end. Finally, I like to convert any png’s to jpg’s if they don’t have transparency. In my experience, these are often logos or screenshots.
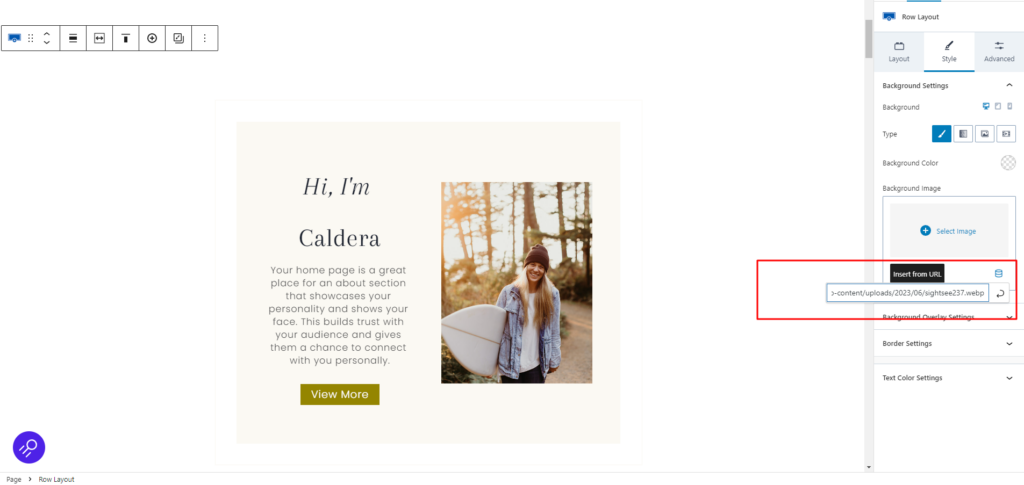
Bonus Tip – WebP Kadence Backgrounds
Since ShortPixel created WebP versions of all of our images, we can simply change the image URL ending from .jpg to .webp on any image used for a section background.
Then, use the insert from URL option instead of selecting the image from your media library!
You did it!
Let us know in the Facebook Group if you have any questions or issues.